|
Background to the battle The Allies deployed three Armies (British 1st and 8th Armies and US 1st Army) against Panzerarmee 'Afrika' (a mixed force of Italian and German divisions).
Map of the battlefield. |
|
North Africa 1943 - The Race For Tunis The Race For Tunis took place on Saturday 13th February 1999 in Bedford. The scenario dealt with the Allied attempt to capture Tunis, and the Axis defence of their bridgehead around the port. |
|
|
|
Background to the battle The Allies deployed three Armies (British 1st and 8th Armies and US 1st Army) against Panzerarmee 'Afrika' (a mixed force of Italian and German divisions).
Map of the battlefield. |
|
|
|
The Allies The Allied Order of Battle included:
|
|
|
|
|
The Axis The Axis Order of Battle included:
|
|
|
|
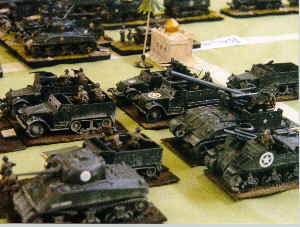
The Battle - The blooding of the US 1st Army The US forces were numerically the largest of the three Allied armies converging on Tunis, but the individual battalions were rated only as ‘trained’, reflecting the fact that this was their first experience of combat. Uniformly equipped, and backed by a powerful artillery arm, they made an impressive sight. Unfortunately, the motley collection of captured trucks, Panzer IIIs with high mileage and sun-tanned Nazis they faced were all rated as ‘veteran’. It was a bloody baptism for the latter-day doughboys. Their massive air support repeatedly bombed the wrong roads and completely missed the equally rapid withdrawal of the Panzers. The Germans withdrew behind their minefields after smashing up 1st US Infantry Division and beheading 6th Armoured Division, having overrun its Headquarters and destroying its Engineer Battalion - which would be sorely missed later. In due course the US forces rallied, reorganized, and eventually battered their way through the German minefields. The Italian troops in the foothills of the djebel were destroyed piecemeal and the US 1st Army ended the game some 50 km from Tunis. |
|
|
|
|
|
The Battle - The veterans of the British 8th Army take on their old adversaries again The British 8th Army found its progress blocked by an Italian Infantry Division in the hills and by 2. Fallschirmjäger-Division, which was dug in behind the minefields on the plain. In a manner worthy of Montgomery, 8th Army chewed its way remorselessly through the Italians. Bombay Sappers lifted the Italian minefield overnight and 72 field guns pounded the defences as the Gurkhas and Rajputs attacked a single Battalion of Italian conscripts. The British Armoured Brigade motored through the resultant gap, and the Axis southern front seemed to be open. However, General der Panzertruppen Willey organized an immediate counter-attack that was preceded by a fierce night clash between Fallschirmjäger patrols and the Sikhs and Pathans of the Central India Horse, flanking the breakthrough with a regiment of Fallschirmjäger. The 8th Army recoiled overnight, with its transport racing far to the rear and its tanks pulled back to defend the gun line. In the morning the Germans had all gone, content with winning time. It was a tactical masterstroke. |
|
|
|
The Battle - The advance of the British 1st Army At the other end of the theatre of operations, the British 1st Army closed up to the Italian Divisions who were lurking behind what appeared to be minefields. Were they real minefields? The inexperienced British had to wait for their engineers to be brought up tell them. As they battered their way through the Italian defences on the third day of action, the Airborne Brigade parachuted behind the Italian lines, almost on top of the Ariete Armoured Division.
Ariete, befitting its fine reputation, put in a gallant counter-attack, but the Red Berets had suffered few losses in the drop and 1st Armoured Division soon linked up with them. The northern front had collapsed, and two battalions of Army Commandos landed overnight to seize Bizerta. The surviving Italians fled down the coast road towards Tunis. |
|
|
|
|
The aftermath of the battle Despite its potential, the Allied Air Forces did not have the impact of their impressive numbers of aircraft suggested. Most of the squadrons were new to this and co-ordination between Allied ground and air forces had some way to go before the cab rank P-47s and Typhoons of Normandy. What should have been modest air support was distinctly mediocre. On the other hand, the Luftwaffe inflicted some damage on the US 1st Army during the German counter-attack, and decimated a US air raid on Tunis. In four days’ fighting, the Allies had advanced 50 km in the south, 75 km in the centre and over 100 km on British 1st Army’s front. The Axis defensive minefield perimeter had been breached and almost all the Italian defenders had been overrun. The Allies were within 50 km of Tunis. However the Panzers had been refitting, and any further advance on Tunis was likely to encounter very heavy opposition, (including three Battalions of heavy tanks). In fact the Allies were in no condition to continue the offensive without a pause for reorganisation and some degree of reinforcement. |
|