|
A German account of the Campaign Account of operations conducted by 2. SS Panzer-Korps in the Arnhem – Eindhoven area 17th – 20th September 1944 and combat lessons learned. Deployment The 17th of September 1944 found the bulk of 2. SS Panzer-Korps resting and refitting some 50 km NE of Arnhem, with plenty of opportunities for drinking brandy and taking photos of the heroic ubermensch in striking poses. My divisional commanders busied themselves filling in falsified strength returns and we awaited reinforcements and replacement equipment. At this time the Korps was organised into three main Kampfgruppen:
Apart from Kampfgruppe Walther, no other German combat forces were defending the area. Field Marshal Model's HQ was located at Oosterbeek. |
|
|
|
|
|
|
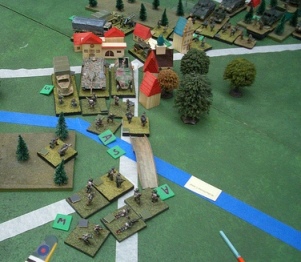
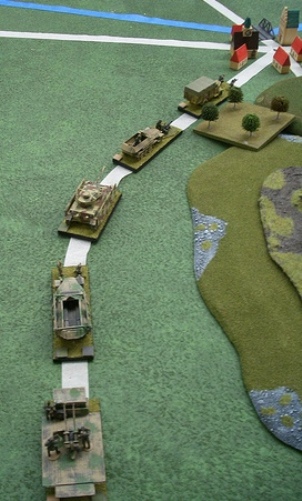
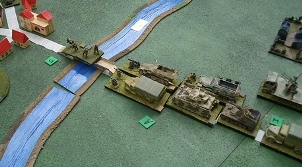
17th September The day opened with columns of Sherman tanks rolling up the road to Valkenswaard, SS Kampfgruppe deployed to meet them. Heavy fighting ensued as the Allies deployed from their road columns and the SS troops gave ground stubbornly, leaving ranks of blazing enemy tanks behind them. The battle was going well, enemy progress was slow and they were suffering heavy losses when around mid-day the sky was filled with the drone of enemy aircraft. By some quirk of geography these passed over my HQ and allowed me to lean on the balcony of the luxurious chateau smoking a hand rolled Turkish cigarette and muse to no-one in particular “If just once I had such resources at my disposal, what I could have done.” The troops at the front reported enemy parachutists had landed all over the Veghel-Eindhoven area and gradually the news filtered through to Army Group B HQ at Arnhem. The parachutists cut the roads through Son and Veghel and began to attack the bridge garrisons. SS Kampfgruppe was assigned the task of counterattack, with professional ease they disengaged, reformed and the complete group took the enemy at Son in the rear. At this juncture 59. Infanterie-Division was released from reserve and began to march towards Son from the direction of Hertgenbosch. As night fell, the Allied tanks were pushing through Valkenswaard to the outskirts of Eindhoven and a confused melee was taking place around the bridges at Veghel and Son. Combat Lessons
|
|
|
|
|
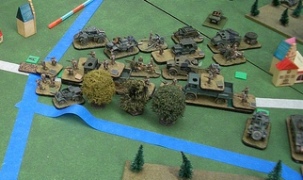
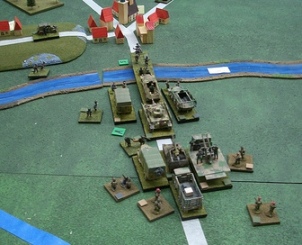
18th September Overnight the Korps was ordered to a high state of alert, but no movement orders were issued. At the staff conference we speculated about Allied intentions, the size of the air landings at Eindhoven were a great shock but we knew from Normandy that they had at least two more parachute divisions. There was the possibility of further drops in divisional strength over the next few days, but short of warning the other commanders about it, there was little we could do. In Eindhoven, Kampfgruppe Walther reorganised its front somewhat and the enemy brought up what appeared to be an entire infantry division and hundreds of guns to attack the city. As dawn broke the ferocious fighting around Eindhoven started again. Rearguards fell back slowly through the city whilst Kampfgruppe Walther renewed its attacks against Son and Veghel. The 88. Korps began to arrive from 15. Armee, but faced with the massive allied forces in the area, immediately commenced the long march northeast towards Grave and Nijmegen to try and form a second defence line. As the front crumbled in the face of the enemy attack, Son bridge was recaptured and a battalion of SS Panzergrenadiers triumphantly set up an all round defence of the bridge. The other SS units moved the east to block the roads leading NE from Eindhoven. Around mid-day my Korps was ordered by Model to march to defend Arnhem, and we set off in road column, expecting to arrive in the city at nightfall. 10. SS were in the lead as I had tasked them with holding The Island south of Arnhem, 9. SS Kampfgruppe brought up the rear, tasked with defending Arnhem itself. This basic operational scheme was adhered to throughout the battle. Simultaneously, 88. Korps began to arrive south of Grave and the sky filled with Dakotas once more. As 88. Korps lead infantry battalions arrived at Grave bridge, the best part of a division of parachutists landed north and south of Nijmegen, threatening both the bridges. In short order the enemy captured Nijmegen bridge but a struggle for possession of Grave bridge began which would last for days. Throughout the afternoon the fighting at Grave raged on, two Regiments of parachutists against half a dozen German battalions, neither side gaining the upper hand. 88. Korps was handicapped by only being able to operate on a narrow front attacking across the bridge. In the south XXX Corps pressed on inexorably, 59. Infanterie-Division fell back to Hertgenbosch and wired the bridge for demolition, the fighting at Veghel went on but the SS held out at Son against repeated assaults. Finally in the evening the victorious Panzergrenadiers fell back to link up with 59. Infanterie-Division, having held up the best part of entire enemy division for an afternoon, whilst the leading elements of 10. SS Kampfgruppe reached the outskirts of Arnhem. Combat Lessons
|
|
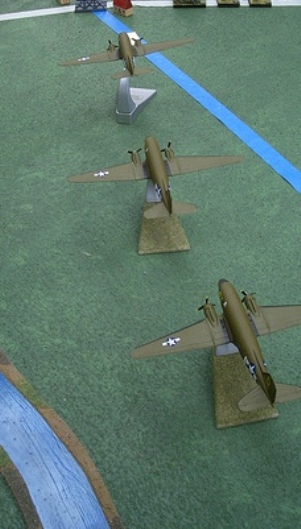
|
|
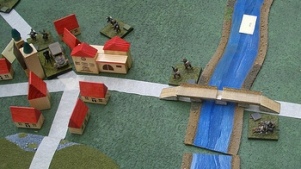
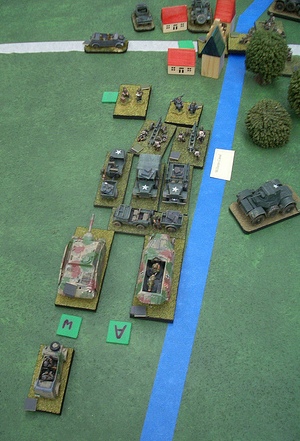
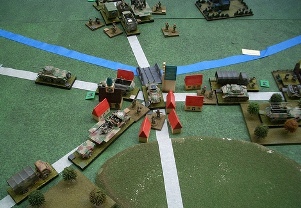
19th September Overnight Kampfgruppe Walther fell back to final blocking positions in the south, whilst still trying to recapture Veghel. 2. SS Panzer-Korps continued its long march and 88. Korps consolidated its positions. SS engineers suggested to 88. Korps that construction of a bridge over the river west of Grave might enable the enemy parachutists to be outflanked. At daybreak, combat resumed north of Eindhoven. The SS troops operating with 59. Infanterie-Division conducted a successful attack against enemy artillery positions around Veghel, sealing the fate of the parachutists there. Kampfgruppe Walther re-took the bridge and prepared a defence against the enemy tanks. The pace of operations slowed in 88. Korps area south of Grave as construction work on a ferry commenced. 9. SS Kampfgruppe fanned out around Arnhem and I located my Corps HQ adjacent to Model to ease communications. 10. SS Kampfgruppe deployed from road column and began attacking the north end of Nijmegen bridge, Panzergrenadiers supported by tanks and SP artillery, the enemy softened up by Luftwaffe air strikes, just like the good old days! As our troops crushed battalion after battalion under their tracks, the sky once more filled with the drone of aircraft. Three more regiments of parachutists fell from the sky – Americans, British and Poles, all aiming for The Island between Nijmegen and Arnhem where 10. SS Kampfgruppe was operating! The wind was strong and two battalions of unfortunate parachutists drifted over Arnhem, along with a Polish brigade headquarters. These suffered heavy losses in landing in a built up area and were speedily destroyed by 9. SS Kampfgruppe, despite repeated enemy fighter bomber attacks. The Polish General appeared to be unable to pronounce the letter ‘G’ properly and an overzealous subordinate had him hung from a telegraph pole. I was somewhat displeased, but Model thought this was an excellent development. Some of the British prisoners were overhead to complain “We appeared to have landed on top of two SS panzer divisions” and “I was rather surprised to find Bittrich's panzer troops here”. Further south things did not go so well, the fresh Americans ran to the aid of their comrades at Nijmegen, whilst the Poles and British landed all over 10. SS Kampfgruppe artillery positions. Brigadefuhrer Harmel somewhat unwisely continued to fight at the bridge whilst sending the tanks back to support the artillery. As might be expected, fighting eight enemy battalions on a dispersed front he was unable to obtain local superiority and suffered heavy casualties as a result. As night fell I ordered him to disengage and reorganise. 88. Korps meanwhile had constructed its ferry and was having great success moving regiments across the river to attack Grave bridge from both ends. Combat Lessons
|
|
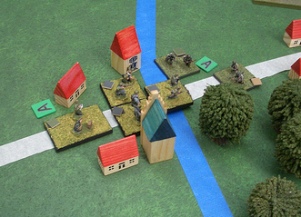
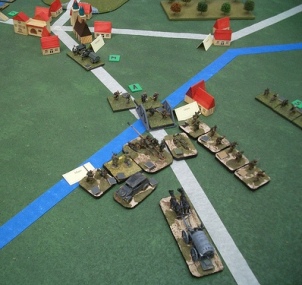
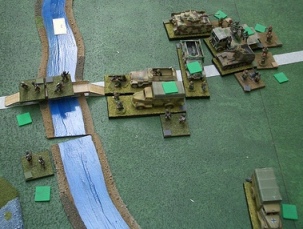
20th September It was with some trepidation that we viewed the next day at HQ. Model was furious at our reverses south of Arnhem and issued an ever more strident series of instructions. I, on the other hand, was determined to deal with enemy by a coordinated attack making the best possible use of our slender resources. It was also obvious that the enemy had unlimited air resources, and all operations had to be conducted with one eye over our shoulder. One bright spot yesterday was the heavy losses our supporting Flak units had inflicted on the enemy ground attack aircraft, which seem to have largely cleared the skies above Arnhem. 10. SS Kampfgruppe withdrew west of the road to reform and 9. SS Kampfgruppe concentrated in Arnhem. The enemy parachutists meanwhile formed a hedgehog at Elst. In the morning 10. SS Kampfgruppe formed up and moved out, whilst 9. SS Kampfgruppe crossed the bridge to support them, leaving the city defended by a handful of armoured cars. The British sat in their hedgehog and the Americans sat on their bridge, whilst accusations of SS cowardice rained down from Models HQ. It was however pointless to rush into a half prepared attack and waste what little combat strength remained. Our radar on the coast reported the inevitable approach of yet more streams of Dakotas, time for a calculated risk! Ignoring the threat from the air, both 9. and 10. SS Kampfgruppen surged forward to attack the hedgehog at Elst and fortune smiled on us once more as the enemy broke after suffering heavy losses, our own losses were acceptable. 10. SS Kampfgruppe set off in pursuit, with only a couple of companies left, whilst 9. SS Kampfgruppe moved back to Arnhem as parachutists dropped all around. Two more parachute brigades plus artillery and the divisional HQ landed on the hills north of Arnhem. One battalion drifted and landed in the city, where it was cut up by the armoured cars, the enemy divisional HQ also landed on top of our forces and was captured. The gloomy British General was offered a cup of tea whilst in captivity by his batman, “Do you really think a cup of tea will help?” he said. 9. SS Kampfgruppe then launched a concerted attack to drive the enemy parachutists out of the city, obeying my instructions to “Flatten Arnhem” and formed a hedgehog around the north end of the bridge once the city was clear. The bridge was wired for demolition as a precautionary measure against capture. In view of Models insults I relocated my HQ to the east side of the city, only to be followed by a pathetic request for an armoured column to protect him from the enemy paratroops. Some armoured cars were duly despatched whilst the surviving British formed up on the hills to the north. They managed to launch an attack on the bridge defenders before nightfall but this was beaten off, and mobile reinforcements from all over Germany were converging on the ragged band of paratroops in the hills. I observed that “They were brave, but it was fool's courage”. In the south, 10. SS Kampfgruppe overran three more battalions of paratroops and captured the north end of Nijmegen bridge, as simultaneously the south end was captured by the SS heroes from Son. Korps Feldt meanwhile overran the Groesbeek Heights and captured the centre of Nijmegen, whilst 107. Panzer-Brigade arrived in support of 88. Korps who captured Grave bridge after their heroic struggle. The leading elements of XXX Corps arrived south of Grave, but with the three key bridges in our hands, it was all over. Combat Lessons
|
|
|
|
|
|
Aftermath The 9. SS Kampfgruppe in Arnhem did not have the strength to conduct a prolonged static defence against repeated attacks by the enemy parachutists. My plan for the future was to withdraw the troops from the city whilst we concentrated sufficient strength to destroy the surviving enemy troops. It is unlikely that the enemy armoured forces would have sufficient time to conduct three assault river crossings to relieve them before they were destroyed, although they had the possibility of escape if they withdrew to Deelen and made use of their air superiority to fly out. The Korps staff was surprised at the boldness of the enemy plan. The use of airpower to deliver division strength attacks from the air over a series of days co-ordinated with the ground forces was brilliant, in the event it was only thwarted by the resolution of our commanders on the ground who maximised the effectiveness of their slender resources to channel the advance of the enemy juggernaut. Key to all our operations were troops of the Waffen SS, small in numbers but well trained and experienced, they formed the keystone of Kampfgruppe Walther prolonged defence and were instrumental in the destruction the enemy parachute divisions north of Grave. Recommendation for a Knights Cross for the commander of the SS Grenadiers who held Son for so long then fought their way north to rejoin their division at Arnhem. Valuable support for our successful operations was provided by Heer and Luftwaffe units from both 15. Armee and 1. Fallschirmjager Armee. Luftwaffe ground support and fighter cover was a welcome combat multiplier on the two occasions it intervened. Current Strength Return 9. SS Kampfgruppe - five company equivalents 10. SS Kampfgruppe - four company equivalents Bittrich |
|


|